The Aircraft
HK559 was built by Vickers-Armstrong at Castle Bromwich, near Birmingham, and delivered to 115 Squadron on 2 June 1944. When lost at Gannes it was on its second operation (having flown to Dreux on 10/11 June with another crew) and had a flying time of just 15 hours.
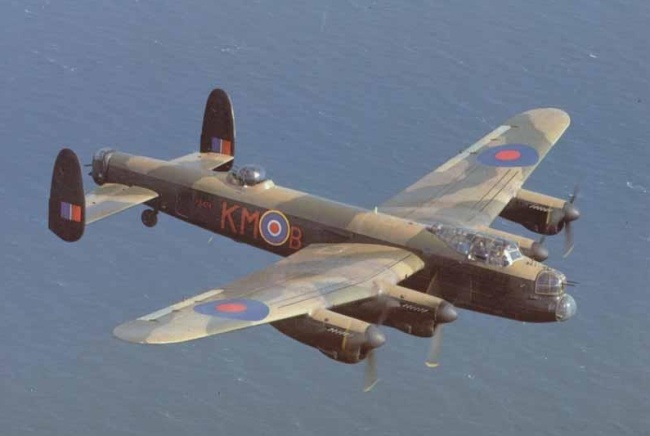
The photograph above is of a Lancaster substantially the same as HK559. The crew consisted of pilot, navigator, flight engineer, bomb aimer, wireless operator and two gunners, one in the mid-upper turret and one in the rear turret.
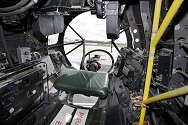
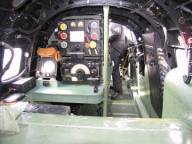
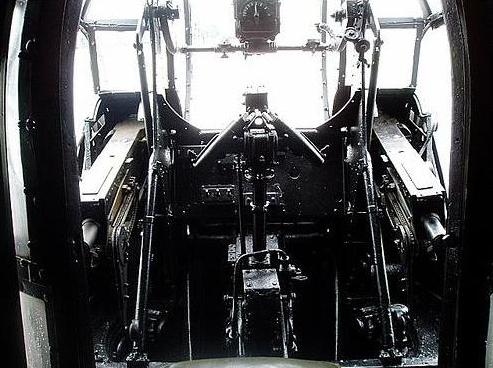
What follows is an edited version of the Wikipedia entry on the crew accommodation, with photographs of the Battle of Britain Memorial Flight’s airworthy Lancaster PA474 and of the rear turret of another one in the Imperial War Museum at Duxford in Cambridgeshire.
Starting at the nose, the bomb aimer had two positions to man. His primary location was lying prone on the floor of the nose of the aircraft, where he had access to the controls for the bombsight on his left and bomb release selectors on the right. He would also use his view out of the large transparent perspex nose cupola to assist the navigator with map reading. To man the nose turret, he simply had to rise and sit in position behind the triggers of his guns. The bomb aimer's position contained the nose parachute exit in the floor.

Moving backwards, on the roof of the bomb bay the pilot and flight engineer sat side-by-side under the expansive canopy, with the pilot sitting on the left on a raised portion of the floor. The flight engineer sat on a collapsible seat to the pilot's right, with the fuel selectors and gauges on a panel behind him and to his right.
Behind these crew members, and behind a curtain fitted to allow him to use light to work, sat the navigator. His position had him facing to port with a large chart table in front of him. An instrument panel showing the airspeed, altitude and other details required for navigation was mounted on the side of the fuselage above the chart table.
The radios for the wireless operator were mounted on the left-hand end of the chart table, facing towards the rear of the aircraft. Behind these radios, facing forwards, on a seat at the front of the main spar sat the wireless operator. To his left was a window, and above him was the astrodome, used for visual signalling and also by the navigator for celestial navigation
Behind the wireless operator were the two spars for the wing, which created a major obstacle for crew members moving down the fuselage, even on the ground. On reaching the end of the bomb bay the floor dropped down to the bottom of the fuselage, and the mid upper gunner's turret was reached. His position allowed a 360° view over the top of the aircraft, with two guns to protect the aircraft from above and to the side. To the rear of the turret was the side crew door, on the starboard side of the fuselage. This was the main entrance to the aircraft, and also could be used as a parachute exit.
At the extreme rear of the aircraft, over the spars for the tailplane, the rear gunner sat in his exposed position in the turret. Neither the mid upper nor rear gunner's positions were heated.